
Installing a dash cam in your car is one of the smartest upgrades you can make for safety and peace of mind. Whether you want to record accidents, monitor your vehicle, or capture road trips, a dash cam provides valuable footage when you need it most.
The good news is that installing a dash cam is easier than it sounds. With a few tools and the right approach, you can set it up yourself without professional help.
What You’ll Need Before Installation
Before starting, gather these basic items:
- Dash cam device
- Power cable (usually included)
- Car charger or hardwire kit
- Adhesive mount or suction mount
- Trim tool or plastic pry tool
- MicroSD card
Having everything ready will make the process smooth and hassle-free.
Step-by-Step Guide to Installing a Dash Cam
Step 1: Choose the Right Position
The ideal placement for your dash cam is:
- Behind or near the rearview mirror
- Centered on the windshield
- Positioned to avoid blocking your view
This ensures a clear recording angle while staying discreet.
Step 2: Clean the Windshield
Before mounting the dash cam:
- Wipe the area with a microfiber cloth
- Remove dust, oil, or fingerprints
A clean surface helps the mount stick properly and prevents it from falling.
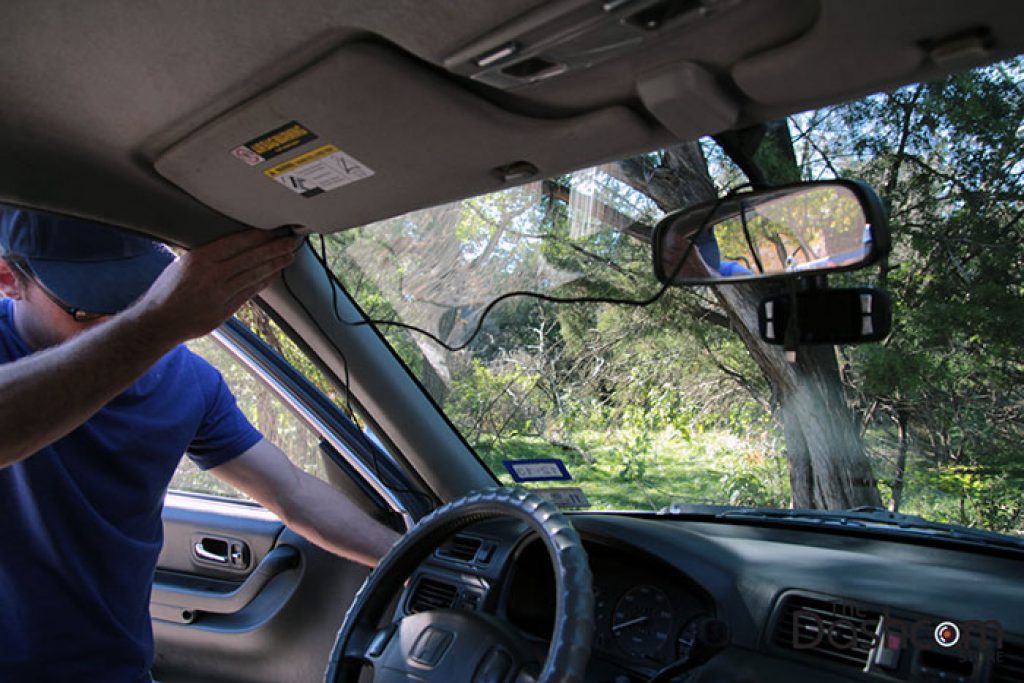
Step 3: Mount the Dash Cam
Attach the camera using:
- Adhesive mount (more secure)
- Suction cup (easier to adjust)
Press firmly and let it sit for a few minutes to ensure proper adhesion.
Step 4: Insert the Memory Card
Insert a compatible microSD card into the dash cam.
- Use the recommended storage size
- Format the card if required
This step is essential for recording and storing footage.
Step 5: Connect the Power Cable
Plug the power cable into the dash cam and route it along the edges of your windshield.
- Tuck the cable into the headliner
- Run it down the A-pillar
- Keep it hidden for a clean look
Avoid placing the cable where it could interfere with airbags.
Step 6: Power Source Options
You have two main options:
1. Cigarette Lighter Socket
- Easy to install
- Plug-and-play setup
2. Hardwiring Kit
- Connects directly to the fuse box
- Enables parking mode recording
- Provides a cleaner installation
Choose based on your needs and comfort level.
Step 7: Adjust the Camera Angle
Turn on the dash cam and adjust the angle:
- Ensure it captures the full road
- Include a small portion of the hood
- Avoid too much sky or dashboard
Proper alignment ensures useful footage.
Step 8: Test the Setup
Before finishing:
- Start your car
- Check if the camera powers on
- Record a short video
- Review the footage
Make sure everything is working correctly.
Installation Overview Table
| Step | Action | Key Tip |
|---|---|---|
| Positioning | Place near rearview mirror | Avoid blocking driver’s view |
| Cleaning | Wipe windshield | Ensure strong mount adhesion |
| Mounting | Attach dash cam | Use firm pressure |
| Memory Setup | Insert microSD card | Format if needed |
| Cable Routing | Hide wires along edges | Keep away from airbags |
| Power Connection | Plug or hardwire | Choose based on convenience |
| Camera Adjustment | Set recording angle | Capture full road view |
| Testing | Check recording | Verify functionality |
Tips for a Clean Installation
- Use cable clips for better wire management
- Avoid loose wires hanging inside the car
- Double-check local laws regarding dash cam placement
- Keep the lens clean for clear recordings
Common Mistakes to Avoid
- Placing the camera too low or too high
- Ignoring cable management
- Using low-quality memory cards
- Not testing the camera after installation
- Blocking airbags with wires
Avoiding these mistakes ensures a safer and more professional setup.
Bonus Insight
Upgrading your vehicle isn’t just about safety—it’s also about performance and convenience. While installing a dash cam enhances security, exploring topics like Best Performance Upgrades for Turbocharged Cars can help you improve your car’s overall driving experience.
FAQs
1. Can I install a dash cam myself?
Yes, most dash cams are designed for easy DIY installation and don’t require professional help.
2. Where should I place my dash cam?
The best place is behind the rearview mirror to ensure a clear view without obstructing your vision.
3. Do I need a hardwire kit?
It’s optional. A hardwire kit is useful if you want features like parking mode and a cleaner setup.
4. How long does installation take?
Typically, it takes 20–40 minutes depending on your experience and setup type.
5. Will a dash cam drain my car battery?
Not usually, especially if you’re using a proper hardwire kit with voltage protection.
Conclusion
Installing a dash cam is a simple yet valuable upgrade that enhances your driving safety and provides peace of mind. By following this step-by-step guide, you can achieve a clean and professional installation without any technical expertise. Take your time, follow each step carefully, and enjoy the benefits of having a reliable recording system in your vehicle.