
Why Gel Nails Are Perfect for At-Home Manicures
DIY beauty routines are more popular than ever, especially as people seek salon-quality results without the price tag or time commitment. Among the most sought-after at-home treatments? Gel manicures. Unlike traditional nail polish, gel formulas deliver a high-gloss, chip-resistant finish that lasts 2–3 weeks, making them ideal for busy lifestyles.
For beginners, the appeal is clear: professional-looking nails, minimal drying time, and fewer touch-ups. But success starts with the right product. If you’re starting your at-home manicure journey, choosing the right gel nail polish can make all the difference in achieving a long-lasting, salon-quality finish.
In this guide, we’ll walk you through everything you need to know, from selecting beginner-friendly formulas to applying and removing gel polish safely, so you can enjoy flawless nails from the comfort of your home.
What Is Gel Nail Polish and How Does It Work?
Gel nail polish is a hybrid formula made of resin, photoinitiators, and pigments that harden only when exposed to UV or LED light. Unlike regular polish, which dries through evaporation, gel cures into a durable, flexible coating that bonds tightly to the nail.
This curing process is key: it eliminates smudging, delivers intense shine, and creates a protective layer that resists chipping, peeling, and water damage. The result? A manicure that stays pristine through dishwashing, typing, and even light gardening, something traditional polish simply can’t match.
Why Beginners Should Choose Gel Nail Polish
Long-Lasting Results
Gel manicures typically last 14–21 days without chipping—perfect for those who don’t want to redo their nails weekly.
High-Gloss Shine
Out of the lamp, gel nails look freshly done—no top coat needed. The glass-like finish mimics a professional salon job.
Quick Drying with LED Lamps
No more accidental smudges! Each layer sets in 30–60 seconds under an LED lamp, so you can move on with your day immediately.
Beginner-Friendly Options Available
Many brands now offer starter kits with simplified steps, pre-measured bottles, and easy-to-follow instructions, ideal for first-timers.
How to Choose the Best Gel Nail Polish for Beginners
Look for Easy Application Formulas
Opt for polishes with a smooth, self-leveling consistency that flows evenly without streaking. Thicker gels are harder to control and prone to bubbling.
Consider Ingredient Safety
Choose “5-free,” “7-free,” or plant-based formulas that avoid harsh chemicals like formaldehyde, toluene, and dibutyl phthalate. Breathable gels also allow oxygen to reach the nail bed, promoting healthier wear.
Check Compatibility with LED Lamps
Not all gels cure under every lamp. Ensure your polish is designed for LED (not just UV) lamps, which are faster, safer, and more common in home kits.
Choose Neutral or Classic Shades First
Start with soft pinks, nudes, or classic reds. These forgiving colors hide minor application errors and suit any occasion, making them perfect for practice.
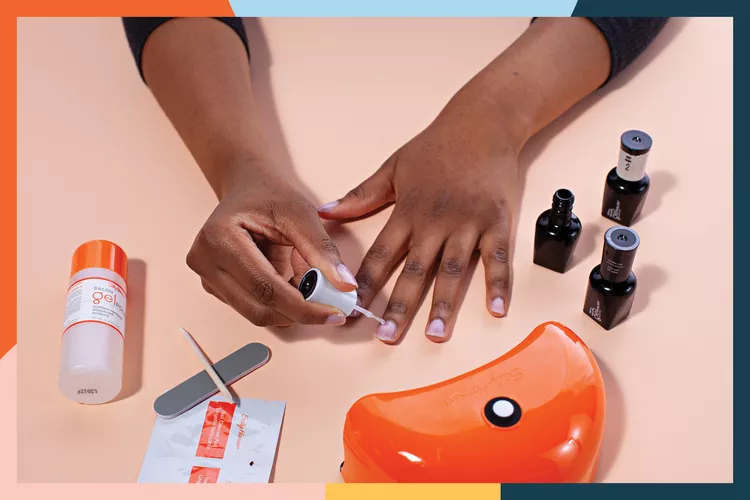
Step-by-Step Guide to Applying Gel Nail Polish at Home
- Prep your nails: Remove old polish, trim and shape nails, then gently buff the surface to remove shine. Clean with alcohol to eliminate oils.
- Apply a thin base coat: This protects your natural nail and improves adhesion. Cure for 30–60 seconds.
- Apply color in thin layers: Two thin coats are better than one thick one. Cure each layer fully.
- Seal with a top coat: This locks in color and adds extra shine. Cure again.
- Wipe off the sticky residue (if required) with alcohol or cleanser.
- Hydrate cuticles with oil to prevent dryness and promote nail health.
Pro tip: Keep layers thin and even—thick polish won’t cure properly and may peel.
Common Mistakes Beginners Should Avoid
- Applying thick layers: Leads to wrinkling, incomplete curing, and early lifting.
- Skipping nail prep: Oils or moisture prevent proper adhesion.
- Not curing long enough: Under-cured gel chips easily. Follow lamp instructions precisely.
- Mixing brands: Base, color, and top coats should ideally be from the same line for compatibility.
- Peeling off gel: Never pick or scrape, it strips your natural nail. Always soak it off properly.
How to Make Your Gel Manicure Last Longer
- Seal the free edge: Wrap polish slightly over the tip of your nail to prevent water from seeping underneath.
- Avoid prolonged water exposure for the first 2 hours after application.
- Use cuticle oil daily to keep nails flexible and reduce lifting.
- Wear gloves when cleaning or handling harsh chemicals.
- Store polishes upright in a cool, dark place to maintain formula integrity.
Safe Removal of Gel Nail Polish
Never peel or file off gel, it damages your nail plate. Instead:
- Gently file the glossy top layer to break the seal.
- Soak cotton pads in 100% acetone and place on each nail.
- Wrap fingers in foil or use clip-on wraps; wait 10–15 minutes.
- Gently push off the softened gel with a wooden stick.
- Moisturize thoroughly afterward, as the acetone is drying. Let nails breathe for a few days before reapplying.
Is Gel Nail Polish Safe for Regular Use?
When applied and removed correctly, gel polish is safe for occasional use. However, frequent application without breaks can lead to dryness or thinning. To protect your nails:
- Limit gel manicures to once every 3–4 weeks
- Always use nourishing cuticle oil
- Choose non-toxic, breathable formulas
- Give your nails a “rest week” between applications
With mindful care, gel polish can be part of a healthy beauty routine.
Start Your At-Home Gel Nail Journey with Confidence
Gel nail polish offers beginners the perfect blend of durability, shine, and convenience, all from the comfort of home. By choosing quality products, following proper techniques, and prioritizing nail health, you can achieve salon-worthy results without setting foot in a spa.
Remember: patience and practice make perfect. Start simple, invest in a good starter kit, and soon you’ll be mastering intricate designs with ease. With the right approach, beautiful, long-lasting nails are just a lamp click away.