
At-home sleep apnea tests offer a convenient way to understand your sleeping patterns. First, consult with a healthcare provider to discuss symptoms such as snoring or daytime fatigue. If they suspect sleep apnea, you’ll get a prescription for a home test kit. After receiving the kit at home, you can easily set it up by securing the belt around your chest and fitting the finger probe properly. The nasal cannula may also be needed for accurate readings. Then, just follow instructions and enjoy a regular night’s sleep while the device collects vital data on your breathing. Afterward, return the equipment and meet with your doctor to review results together!
1. Understanding At-Home Sleep Apnea Tests
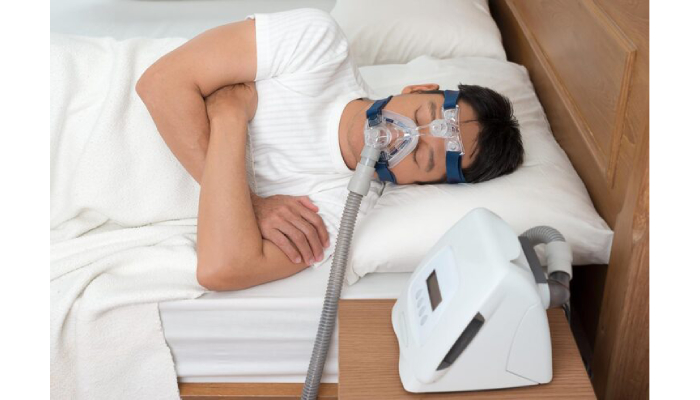
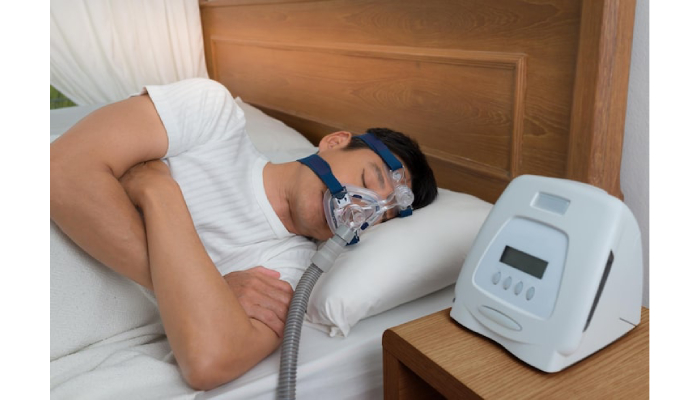
At home sleep apnea test are innovative tools designed to diagnose obstructive sleep apnea (OSA) by monitoring vital signs, like breathing patterns, heart rate, and oxygen levels, while you sleep. OSA, characterized by repeated breathing interruptions during sleep, can lead to symptoms such as loud snoring, daytime fatigue, and difficulty concentrating. Unlike traditional in-lab tests that require an overnight stay in a sleep clinic, at-home tests offer a more comfortable and convenient option, allowing you to assess your sleep in the familiar environment of your own bed.
These tests typically use portable devices equipped with advanced sensors that track your vital signs throughout the night. By focusing on critical metrics, they provide valuable insights into your sleep quality and breathing patterns, making them a reliable option for many patients. At-home tests are especially beneficial for individuals with mobility issues, as they eliminate the need for travel and lengthy hospital stays.
Accurate diagnosis through at-home tests is essential for effective treatment planning. The results can guide healthcare providers in recommending interventions such as Continuous Positive Airway Pressure (CPAP) therapy or lifestyle changes to improve sleep quality. However, it’s important to address common misconceptions surrounding these tests, such as the belief that they are only for severe cases. They can actually facilitate early detection of sleep-related breathing disorders, which is crucial for timely intervention.
Many patients have reported positive experiences with home sleep tests, appreciating the ease and comfort of conducting the test at home. The data collected can lead to tailored treatment options, enhancing overall health and well-being.
2. Initial Steps Before the Test
Before diving into an at-home sleep apnea test, it’s crucial to identify symptoms that may indicate you have sleep apnea. Look for signs like loud snoring, choking or gasping during sleep, and chronic fatigue during the day. These symptoms can guide your conversation with your healthcare provider. When you schedule a consultation, come prepared with a list of these symptoms and any patterns you’ve noticed in your sleep habits.
During your visit, don’t hesitate to ask specific questions. Inquire about the risk factors associated with sleep apnea, such as obesity, age, and family history. Understanding your personal and family medical history can provide valuable insight into your risk level. Discuss any other health conditions you may have, as these can influence your sleep quality and the test results.
Your healthcare provider may use sleep questionnaires to assess your sleep patterns and overall health. Make sure to document your sleep habits over a week or two leading up to your appointment, note when you go to bed, how often you wake up, and any daytime sleepiness you experience. This information can help your provider make a more accurate assessment.
If sleep apnea is suspected, your doctor will typically prescribe a home sleep test, which can be a more comfortable option than spending the night in a lab. This prescription is essential, as it allows you to obtain the testing kit. Overall, these initial steps are vital for setting the stage for an effective at-home sleep apnea test.
3. Obtaining the Home Sleep Test Kit
When it comes to obtaining your home sleep test kit, you’ll find a variety of options available. These kits can range from simple devices that monitor your breathing to more advanced setups that track multiple parameters such as oxygen levels and heart rate. To choose the right kit, consider your symptoms: if you experience loud snoring and daytime fatigue, a more comprehensive kit may be beneficial. You can order the kit online through your healthcare provider or pick it up directly from a clinic or pharmacy.
Once you have the kit, take the time to read the included instructions carefully. Understanding how the equipment works is crucial for accurate results. Upon receiving the kit, check that all components are present. If you notice anything missing or damaged, contact the supplier immediately to resolve the issue.
It’s essential to set up the equipment before your test date. Aim to have everything ready at least a few days in advance, as this gives you time to familiarize yourself with the process. Additionally, prepare your bedroom for testing: eliminate distractions, adjust the lighting, and set a comfortable temperature to create the ideal sleep environment.
Having support from family or friends can also enhance your testing experience. They can assist you with setup or help ensure you stick to your usual sleep routine. With the right kit and a conducive environment, you’re on your way to a successful home sleep test!
4. Step-by-Step Setup for the Test
Start by preparing the chest belt. Wrap it snugly around your chest, over a t-shirt or tank top, and secure it by clipping the belt together. Make sure it’s tight enough to stay in place but not so tight that it’s uncomfortable. Next, connect the loose wire to the designated slot on the belt. To avoid tangles, thread the wire through your shirt collar and down an arm, keeping it neat and unobtrusive.
For the finger probe, place the pulse oximeter on your non-dominant hand’s ring finger. Ensure that it fits securely without pinching. Remove any rings or nail polish to get an accurate reading, and consider using tape to keep it in place. To prevent any discomfort during the night, use tape to secure the wires around your wrist or arm, minimizing movement that could disrupt your sleep.
If your test kit includes a nasal cannula, insert it into your nostrils, ensuring it fits snugly and loops comfortably around your ears. This will help you maintain effective airflow throughout the night. When you’re ready for bed, follow the instructions to start the device. It’s best to maintain your usual sleep routine, avoiding caffeine and alcohol beforehand to ensure reliable results.
Adjust your sleeping position for comfort. If you typically sleep on your side, consider doing so, as this can help with airflow. If you encounter any issues during setup, like discomfort or loose connections, take a moment to adjust everything carefully. Common problems include tangled wires or an insecure finger probe, so double-check your setup before settling in for the night.
5. During the Sleep Test
As you settle in for the night, remember that the device is working hard to collect important data about your breathing patterns, oxygen levels, and heart rate while you sleep. It’s crucial to stick to your normal sleep habits during this time; this helps ensure the test results are accurate. If you happen to wake up during the night, don’t panic. Simply try to go back to sleep as soon as possible to minimize disruptions in the data collection.
Discomfort from the equipment can be expected, especially if you are not used to wearing devices while sleeping. If you feel uncomfortable, take a moment to adjust the straps or reposition the nasal cannula to ensure a better fit. Avoid making significant changes to your sleep environment, such as altering the room temperature or switching your usual bedding, as these factors can affect your sleep quality.
To keep everything functioning correctly, check that the device is properly secured and that any sensors are in place before you drift off. You might experience some sleep interruptions; this is normal as your body adjusts to the equipment. If anxiety or stress creeps in, focus on your breathing and remind yourself that this process is a step toward better health. Embrace the opportunity to relax, and trust that you are taking positive steps toward understanding your sleep patterns.
6. Post-Test Steps
After completing your at-home sleep apnea test, it’s time to focus on the next steps to ensure a smooth transition into understanding your health. First, carefully package the equipment according to the instructions provided. This usually involves placing everything back in the original box or a designated return envelope. Make sure to return it promptly to avoid any late fees or complications. Once you send the equipment back, you can expect to hear from your healthcare provider within a week or two regarding your test results.
Interpreting your results can be straightforward. If the test indicates sleep apnea, your provider will discuss the severity and potential treatment options during a follow-up appointment. It’s crucial to attend this visit, as it will help you understand your diagnosis and the next steps. Be prepared to discuss your symptoms, any changes in your sleep patterns, and your overall health during this appointment.
If your results suggest sleep apnea, treatments like CPAP therapy, lifestyle changes, or dental appliances may be recommended. Alternatively, if your results are inconclusive, further evaluation might be necessary. In either case, adjusting your lifestyle can significantly impact your sleep quality. Focusing on sleep hygiene practices, like maintaining a regular sleep schedule, creating a comfortable sleep environment, and avoiding stimulants before bedtime, will be essential.
Finally, remember that the follow-up appointment is your chance to ask questions, express concerns, and fully understand your condition. Engaging in this dialogue will empower you to take control of your sleep health.
7. Accuracy and Limitations of Home Tests
Home sleep tests can be quite effective, especially for diagnosing moderate to severe obstructive sleep apnea (OSA), with accuracy rates often reported between 70% and 90%. However, these tests may miss milder cases or other sleep disorders, as they do not monitor brain activity or sleep stages like in-lab tests do. For example, while a home test might confirm OSA, it might overlook conditions like central sleep apnea or complex sleep disorders.
Several factors can impact the accuracy of home tests. Poorly fitted equipment, such as a loose nasal cannula or improperly placed sensors, can lead to inadequate data collection. This might result in false negatives, where the test fails to detect a problem, or false positives, where it suggests an issue that isn’t present. Sleep position, body movements, and even ambient noise can also play a role in the outcomes.
Your healthcare provider is crucial in interpreting the results of a home sleep test. They can help differentiate between true sleep apnea and other conditions that may mimic its symptoms. If the test results are inconclusive or if you exhibit complex symptoms, additional testing in a sleep lab may be necessary. Preparing for this follow-up might include avoiding certain medications or alcohol before the test. Addressing concerns about test accuracy with your provider is essential, as they can provide clarity and guidance on the next steps to take.
8. Cost of Home Sleep Tests
Home sleep tests typically range from $150 to $500, making them a more wallet-friendly option than traditional in-lab sleep studies, which can cost anywhere from $1,000 to $3,000. However, the actual cost you pay can depend heavily on your insurance coverage. Many insurers will cover home sleep tests if they are prescribed by a healthcare provider, but it’s crucial to confirm your specific plan’s details before scheduling the test. This means checking your deductible, copay, and any out-of-pocket maximums you may need to meet.
When budgeting for a home sleep test, also consider potential additional costs for follow-up treatments, such as CPAP machines, if sleep apnea is diagnosed. These costs can add up, so it is wise to have a financial plan in place. Look for affordable testing options through local clinics or online providers, as prices can vary based on geographic location. Some places may offer discounts or payment plans, so don’t hesitate to ask.
If you are concerned about costs, inquire about financing options available through the testing provider. Many companies offer payment plans that allow you to spread out the costs over time, making it easier on your finances. Finally, always check with your insurance provider to confirm coverage before you schedule your test. This proactive step can save you from unexpected expenses later on, allowing you to focus on your health.