
Organizing cables in media walls with shelves can be both fun and rewarding. Start with custom design solutions like built-in cabinets that conceal all those pesky wires while keeping things neat. Recessed AV panels can also help keep your tech flush against the wall, eliminating any awkward gaps. Utilize flexible conduits for easy upgrades, and don’t forget cable clips and ties to keep everything bundled together below furniture or along walls. Planning is key; sketch out your layout ahead of time to avoid headaches later. Lastly, consider safety by ensuring proper airflow around equipment and maintain a stylish look with decorative elements, happy organizing!
1. Custom Design Solutions for Cable Organization
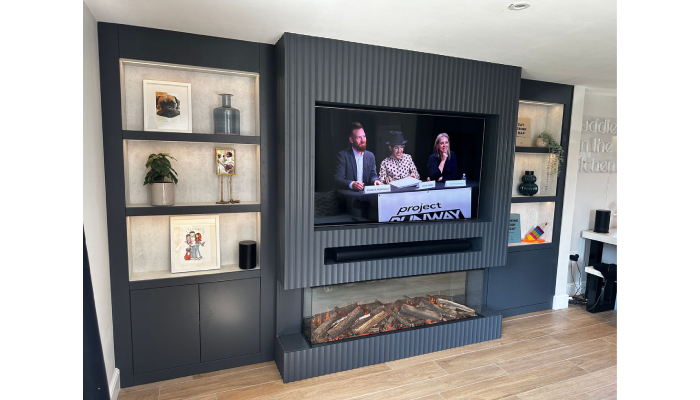
Creating an organized media walls with shelves is all about custom design solutions that blend functionality with style. Built-in panels are a fantastic option, allowing you to hide cables behind the TV while still keeping everything accessible. You can even design these panels with false access points, making future adjustments a breeze (Homes & Gardens). Recessed AV panels also help by keeping your power, aerial, and data ports flush with the wall, ensuring your TV stays perfectly aligned without any unsightly plugs pushing it outward (Media Wall Master).
When it comes to shelving, think about custom designs that integrate cable management systems. This way, you can hide unsightly wires and keep your space looking tidy. Using color-coded cables can be a game-changer, as it allows you to identify connections at a glance, saving you time and hassle. Modular systems are also worth considering; they can be adjusted or expanded easily, accommodating new devices as your tech collection grows.
Hidden power strips within your cabinets offer easy access while keeping cords neatly out of sight, enhancing the overall aesthetic of your media wall. Flexible mounting options for your TV and devices mean you can reposition them without disrupting your organized setup. Additionally, incorporating smart home systems can reduce the number of visible cables by allowing for wireless connections. Wall-mounted storage solutions can further streamline your space, offering a place for both devices and their cables, ensuring everything stays organized.
If you’re looking for a truly personalized touch, collaborating with a designer can help you create a customized solution that fits your specific needs and style perfectly.

2. Effective Cable Management Strategies
Effective cable management is crucial for a tidy and functional media wall. One of the smart strategies is using flexible conduits to run HDMI, Ethernet, and optical leads through the wall. This not only keeps the cables hidden but also allows for easy upgrades in the future without the hassle of cutting into the wall again. Cable clips and ties are another handy tool, perfect for bundling and organizing cables along the base of furniture or walls. You can even find decorative options that blend seamlessly with your room’s aesthetic, adding a touch of style to your setup.
Cable sleeves are a fantastic solution for encompassing multiple cables, providing a neat appearance and preventing the frustrating issue of tangling. For those who want to keep cables from hanging down and getting tangled, installing cable trays or channels along walls or furniture can be a game changer. Additionally, using color-coded labels can help you quickly identify cables, especially in more complex setups, making troubleshooting a breeze.
If you’re looking for a way to manage under-desk clutter, cable management boxes are excellent for hiding and organizing cables from computers and devices. Velcro straps can also be useful, as they allow for easy adjustments when adding or removing devices. For a more decorative approach, consider incorporating stylish cable boxes that not only hide multiple cables but also enhance the room’s overall look. Magnetic cable holders can keep cables in place on metal surfaces, contributing to a clean and organized appearance. Lastly, schedule regular checks to adjust and reorganize cables as needed, especially after adding new devices, ensuring that your media wall remains as tidy as possible.
- Flexible Conduits: Use flexible conduits to run HDMI, Ethernet, and optical leads through the wall. This allows for easy upgrades without the need for cutting into the wall again (Media Wall Master).
- Cable Clips and Ties: Utilize cable clips and ties to bundle and organize cables along the base of furniture or walls. Decorative options can blend with the room’s aesthetic (Homes & Gardens).
- Cable Sleeves: Use cable sleeves that can encompass multiple cables, providing a neat appearance and preventing tangling.
- Cable Trays: Install cable trays or channels along walls or furniture to keep cables from hanging down and getting tangled.
- Color-Coded Labels: Label cables with colored tags or stickers for easy identification, especially in complex setups.
- Under-Desk Management: Use under-desk cable management boxes to hide and organize cables from computers and devices.
- Velcro Straps: Use Velcro straps to secure cables together, allowing for easy adjustments when adding or removing devices.
- Cable Boxes: Incorporate decorative boxes that can hide multiple cables while adding an aesthetic touch to the room.
- Magnetic Cable Holders: Use magnetic holders to keep cables in place on metal surfaces, maintaining a clean look.
- Regular Reorganization: Schedule periodic checks to adjust and reorganize cables as needed, especially after adding new devices.
3. Choosing the Right Furniture for Cable Hiding
When it comes to organizing cables in media walls, selecting the right furniture can make all the difference. Start by looking for cabinets with built-in cable management systems. These often feature channels and removable back panels, allowing you to access and organize cables easily while keeping them out of sight. For a more decorative approach, consider stylish cable boxes that not only hide the clutter but also complement your decor. Media consoles with open backs are another fantastic choice, as they enable easy cable routing while maintaining a sleek appearance.
Don’t forget about furniture with built-in storage options. Pieces like TV stands with integrated management features can help keep everything tidy and organized. If you want versatility, modular furniture is ideal, as it can be reconfigured based on your needs, providing flexibility in how you manage your cables. Low profile designs can also minimize the visual impact of visible cables, creating a streamlined look.
For those who appreciate character, vintage or antique furniture can be modified for modern cable management needs, adding a unique touch to your space. By thoughtfully choosing furniture that addresses cable management, you can create a clean, functional media wall that enhances your home’s aesthetic.
4. Planning Your Media Wall Layout
Planning your media wall layout is crucial for an organized and aesthetically pleasing setup. Start with socket layout planning: sketch where your TV and devices will go, ensuring you include extra power outlets for future needs. This foresight can save you from the hassle of modifications later on. As you set up, clearly label all cables at both ends. This simple step is invaluable for quick identification during troubleshooting or when you want to upgrade your devices.
Next, think about device placement. Keep frequently used devices easily accessible, while ensuring that cables have clear pathways to run without obstruction. This reduces the risk of tangling and damage over time. Don’t forget to consider height; place devices at comfortable viewing levels, and factor in cable lengths for proper connections.
As technology evolves, plan for future expansions. Design your layout to accommodate additional devices or changes, which can save time and effort down the road. Accessibility is another key factor; ensure that cables and ports are easy to reach for maintenance or adjustments. A symmetrical layout not only looks good but also helps in organizing cables effectively.
Lastly, think about how your media wall integrates with your room’s decor. Conceal cables to create a clean, intentional look. And always have a backup plan for cable management in case of unexpected changes or upgrades to your devices.
5. Installation Tips for a Neat Setup
When setting up your media wall, safety and organization are key. Start with in-wall power solutions that are rated for safety, as using extension cords inside walls can pose hazards. Cable management accessories, like raceways, can help keep visible cables tidy and out of sight. If you feel unsure about the installation process, hiring professionals can ensure everything is done correctly and safely.
As you work, make sure all connections are secure and properly seated to prevent any signal loss. When drilling access holes for your cables, keep them appropriately sized to minimize damage to your drywall. A fish tape is a handy tool for guiding cables through walls, making the installation smoother.
Always follow local building codes when installing electrical components to avoid any potential issues. Before finalizing your setup, test all connections to ensure everything works perfectly. And don’t forget to clean up any debris after installation to leave your space tidy. Keeping a record of your cable layout will also be beneficial for future adjustments, making it easier to troubleshoot or upgrade your system.
6. Future-Proofing Your Cable Solutions
Future-proofing your cable solutions is key to keeping your media wall tidy and adaptable. Start by installing conduits between your TV and media cabinet; this allows for easy cable replacement in the future without cutting into the wall again. It’s a simple step that saves you from potential headaches later on. Additionally, separate low-voltage cables, like HDMI and Ethernet, from power cables. This prevents interference, ensuring your devices work seamlessly.
Anticipate future technology needs by planning for extra ports or connections during your initial setup. This foresight can save you time and frustration when upgrading devices down the road. Wireless options are also worth considering for certain devices, as they can significantly reduce the number of cables you need. Modular systems can be an excellent choice, as they are designed to be adjusted or expanded, keeping pace with evolving technology.
Using standardized cables is another smart move, as they are more likely to be compatible with future devices. Don’t forget to label your cables and ports clearly; this simple act makes future changes and troubleshooting much easier. Staying informed about new technologies will help you maintain compatibility with upcoming devices, ensuring your media wall remains functional and modern. Opt for devices that feature universal connections, allowing for flexibility in your setups. Finally, create backup solutions for critical connections to ensure that everything continues to function smoothly, even in the event of a cable failure.
7. Ensuring Safety and Aesthetics
When organizing cables in media walls, safety and aesthetics go hand in hand. Start by avoiding overcrowding, ensuring proper airflow around your AV equipment to prevent overheating, which can be a fire hazard. Keep cables organized to eliminate tripping risks, especially in busy family spaces. Incorporate decorative elements like wall art or lush plants, cleverly disguising visible cables while enhancing the overall look of your room. Decorative cable covers that match your wall color can seamlessly blend in, keeping everything looking tidy.
Securing loose cables is crucial not just for appearance but also for preventing damage to the cords. Make sure all products you use meet safety ratings and regulations to keep your home safe. If you have children, consider childproof cable management solutions that prevent their access to cords, ensuring a safe environment. Regular maintenance is key; periodic checks will help you verify that all cables are functioning correctly and remain organized. Think about smart home devices that reduce visible cables through wireless connections, supporting a minimalist design approach that promotes cleanliness. Lastly, integrated LED lighting can highlight your media wall, creating a stunning focal point while keeping your cables hidden and out of sight.
8. Maintenance Tips for Cable Management
Maintaining a tidy and functional cable setup is key to enjoying your media wall. Start with regular checks on your cable connections; this helps ensure everything stays organized and functions well. For example, testing the signal integrity of your devices can prevent frustrating interruptions during movie nights. Don’t forget to remove any dust or debris from the area around cables, as this not only keeps things looking neat but also protects against potential damage.
Being proactive about replacing worn or damaged cables is essential for peak performance; a frayed cable can lead to signal loss or device failure. As you add new devices to your media wall, take the time to reassess your cable layout. This can prevent chaos and ensure everything fits seamlessly.
Keep your cables labeled clearly, updating labels as needed. This small step can save you a lot of time and hassle when troubleshooting or upgrading. Ensure that furniture or other objects don’t obstruct cable pathways, as this can lead to tangling or damage.
For more complex setups, consider scheduling professional inspections to ensure everything runs safely and efficiently. It’s also beneficial to stay informed about new technologies that could enhance your cable management strategies. Keeping a log of changes made can be invaluable for future reference, while having a quick emergency plan in place for any cable issues can save you from potential headaches.