
If your kitchen exhaust hood isn’t working, don’t panic. There are several common issues that could be causing the problem. First, check for power issues like a blown fuse or a tripped circuit breaker; sometimes it can be as simple as a faulty outlet. If the fan isn’t operating, inspect its motor and connections, digital control boards can also fail occasionally. Clogged filters might be choking airflow, so regular cleaning is essential. Lastly, look for duct blockages that prevent air from leaving effectively. If you’ve tried troubleshooting these aspects with no success, consulting a professional can save both time and frustration!
1. Common Issues with Kitchen Exhaust Hoods
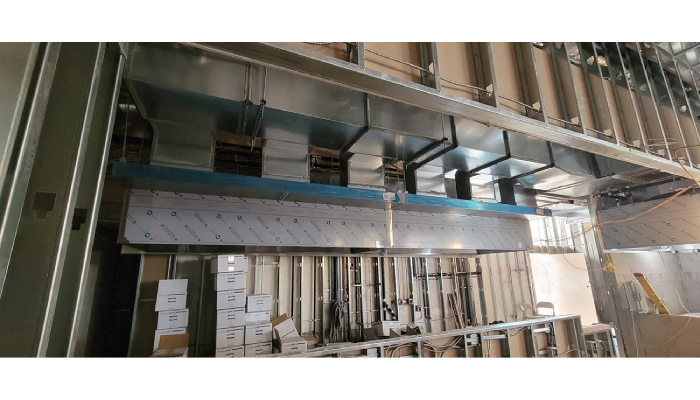
Kitchen exhaust hood repair are essential for keeping your cooking area fresh and free from smoke, grease, and odors, but they can encounter a range of issues. One of the most common problems is power issues, which can stem from a blown fuse, a faulty outlet, or a tripped circuit breaker. If your hood won’t turn on at all, it’s worth checking these electrical components first. Another frequent culprit is fan malfunctions. The fan could fail to operate due to a defective motor, broken fan blades, or problems with the control board, leading to diminished airflow.
Lighting problems may also arise, often due to burnt-out bulbs or loose connections that leave your kitchen dim. Regularly checking and replacing bulbs can prevent such annoyances. Clogged filters are another major issue; when grease and debris build up, they restrict airflow, making it crucial to clean or replace them regularly for optimal performance.
Duct blockages can significantly hamper the effectiveness of your exhaust hood. If debris or improper installation is causing air to get trapped, it’s time to inspect the ducts. You might also notice unusual noises coming from the fan, which could signal loose components or damaged blades that need immediate attention. If you experience slow airflow, it could indicate dirty filters or duct obstructions, both of which require prompt action.
Overheating is a serious concern, as it can occur if the fan motor is overworked or if there’s insufficient ventilation. Finally, issues with the control panel can prevent the hood from responding correctly, often requiring a reset or repair. If odors linger in your kitchen despite using the exhaust hood, this may point to duct issues or a malfunctioning filter affecting air quality. Addressing these common problems proactively can ensure your kitchen remains a safe and pleasant space.
2. Troubleshooting Steps for Exhaust Hood Problems
When your kitchen exhaust hood isn’t performing as it should, a few straightforward troubleshooting steps can help you identify the issue and get things back on track. Start by checking the power supply: ensure the hood is plugged in and test the outlet with another device to confirm it’s working. Don’t forget to inspect the circuit breaker for any tripped breakers; a simple reset might do the trick. Next, take a closer look at the fan. If it isn’t turning on, check the motor connections and look for any burnt marks or damaged wires. Also, ensure the fan blades are intact and clean, as debris can hinder performance.
Lighting issues can also be a concern. If your hood lights are out, try replacing the bulbs first. Ensure connections are tight and inspect the light sockets for any damage. For filters, regular cleaning or replacement is crucial. If you have metal filters, wash them with warm, soapy water; charcoal filters in ductless systems should be replaced every few months to maintain proper suction.
Blockages in the ductwork can significantly affect airflow, so inspect the ducts and air dampers to ensure they open and close properly. Don’t overlook mechanical components either. Check for wear on fan belts, especially in commercial setups where they may need lubrication. Additionally, ensure the hood is correctly mounted to reduce vibrations and noise, which can impact performance over time.
Be mindful of any signs of water damage or corrosion around electrical connections, as these can lead to short circuits. Lastly, test the exhaust fan on different speed settings to see if performance issues are more pronounced at lower speeds. Document any recurring problems to provide detailed information to a technician if you need professional help later.
- Check Power Supply by ensuring the hood is plugged in, testing the outlet with another device, and inspecting the circuit breaker for any tripped breakers.
- Inspect the Fan by checking motor connections, looking for burnt marks or damaged wires, and verifying the fan blades are intact and clean.
- Lighting Issues can be addressed by replacing bulbs, ensuring tight connections, and inspecting light sockets for any damage.
- Clean or Replace Filters regularly, using warm, soapy water for metal filters and replacing charcoal filters in ductless systems every few months.
- Check for Blockages in ductwork, inspecting air dampers to ensure they open and close properly for optimal airflow.
- Mechanical Components should be inspected for wear, especially in commercial setups where fan belts may be exposed and require lubrication.
- Ensure the hood is mounted correctly to reduce vibrations and noise, which can affect performance over time.
- Look for signs of water damage or corrosion around electrical connections, which can lead to short circuits.
- Test the exhaust fan on different speed settings to identify performance issues that may not be apparent on low speed.
- Document any recurring issues to provide detailed information to a technician if professional help is needed.
3. Power Supply Checks for Exhaust Hoods
When your kitchen exhaust hood isn’t working, the first thing to check is the power supply. Start by ensuring the hood is plugged into a functional outlet. You can do this by testing it with another appliance, like a blender or toaster, to confirm the outlet is working properly. If the outlet seems fine but the hood is still unresponsive, take a look at your circuit breaker panel. Sometimes, a tripped breaker can be the culprit, and simply resetting it might get your hood back in action.
If the breaker is intact, grab a multimeter and check for voltage at the outlet. This will help you determine if power is reaching the exhaust hood. Don’t forget to inspect the power cord for any visible damage or wear, as frayed cords can interrupt the power supply. While you’re at it, look inside the hood for any loose connections that could be causing intermittent power issues; tightening them might do the trick.
If you notice signs of electrical arcing or burning near the power connections, this indicates serious problems that need immediate attention. In persistent cases of power issues, consider hiring a qualified electrician to inspect the internal wiring for safety and compliance.
Also, make sure the power requirements of your exhaust hood match your home’s electrical system to avoid compatibility problems. If you’re using an extension cord, ensure it’s rated for the load and in good condition. Finally, document any fluctuations in your home’s electrical system, as these could affect the performance of your appliances.
4. Fan Inspection and Maintenance Tips
Keeping your kitchen exhaust hood fan in top shape is crucial for effective ventilation. Start by ensuring that the fan blades are clean and free of grease buildup, as this can hinder performance and create unwanted noise. Regularly check the blades for any visible damage, replacing them if they are bent or broken to maintain airflow efficiency. While the fan is running, listen for unusual sounds: grinding or rattling may indicate issues with the motor or bearings that need immediate attention.
Lubricating the motor and moving parts according to the manufacturer’s guidelines is essential for smooth operation and longevity. Inspect the fan motor for signs of overheating or wear, and replace it if necessary to prevent complete failure. It’s also vital to check that all electrical connections to the fan are secure and free from corrosion, which can disrupt consistent operation.
Don’t forget to test the fan on all speed settings to ensure it operates effectively across the range; a lack of change in performance could indicate a control issue. If the fan is heavily soiled or if disassembly is needed for a thorough inspection, consider professional cleaning. Documenting any maintenance performed will help you keep track of the fan’s condition and service needs over time. Lastly, regularly check for any obstructions in the fan assembly that might affect its ability to expel air effectively.
5. Addressing Lighting Issues in Exhaust Hoods
First things first, if your kitchen exhaust hood lights are flickering or completely out, check those bulbs! Replace any burnt-out ones using the correct wattage as specified by the manufacturer to prevent future headaches. It’s also wise to inspect the connections between the bulbs and sockets, making sure they fit snugly to maintain power. If the fan is buzzing but the lights are dim, there might be a malfunction in the control panel, which could be affecting the lighting. Don’t forget to take a peek at the wiring leading to the light fixtures; any signs of damage or corrosion could disrupt the power supply.
Upgrading to energy-efficient LED bulbs can be a game changer, lasting longer and consuming less power than traditional options. If you notice flickering lights, it could signal a loose connection or an electrical issue that needs immediate attention. Keeping a record of the type of bulbs used and their lifespan can help identify patterns in lighting failures over time, making troubleshooting easier.
Also, ensure the lens or cover is clean, as dirt can block light output, giving the illusion of dim bulbs. Inspect the control board for any burnt spots or damage that might interfere with lighting functionality, and consider a replacement if necessary. If issues persist despite your best efforts, don’t hesitate to consult a professional who can safely diagnose any electrical problems.
6. Cleaning and Replacing Filters Effectively
Keeping your kitchen exhaust hood in top shape means paying close attention to the filters. Regularly check them for grease buildup and clean or replace them as needed to ensure proper airflow and efficiency. Metal filters can be easily washed in warm, soapy water; just make sure they are thoroughly dried before reinstalling them. For ductless systems, charcoal filters should be replaced every 3 to 6 months based on how often you cook, so mark down the last replacement date to keep yourself on schedule. To give metal filters a more effective clean, use a soft brush or a vacuum attachment to remove loose debris before washing. For stubborn grease, consider specialized cleaning solutions, following the manufacturer’s instructions for best results. Always inspect filters for warping or holes, as these signs indicate they need replacement. Additionally, check that filters fit snugly and securely during installation to avoid airflow issues. It’s helpful to educate everyone in the kitchen about the importance of regular filter maintenance, creating a team effort in keeping the exhaust system functional. Lastly, keep spare filters on hand to ensure quick replacements when needed, which minimizes downtime and keeps your kitchen running smoothly.
7. Identifying and Resolving Duct Blockages
To tackle duct blockages, start by visually inspecting the ductwork for any obvious signs of debris or collapsed sections. Check the air damper to ensure it opens and closes properly, allowing airflow without obstruction. A flashlight can be your best friend here, helping you look into the ducts for hidden blockages. Clear out any visible debris or buildup that you find. If you notice accumulated dust or grease, using a vacuum with a long hose attachment can effectively clean out the ducts. Should airflow issues persist, it might be time to call in a professional duct cleaning service for thorough cleaning. Take the time to document any access points in the ductwork, making future inspections and maintenance easier. Ensure that your ducts are properly sealed and insulated to prevent air leaks that could lead to blockages. Installing duct covers or filters at entry points can also help minimize debris accumulation. Educate your kitchen staff about the importance of keeping the area around the hood and ducts clean, as this proactive approach can prevent blockages. Lastly, make it a habit to regularly inspect ductwork for any signs of wear or damage, as even small issues can lead to significant airflow problems.
8. Mechanical Component Checks for Exhaust Hoods
When your kitchen exhaust hood is not performing as expected, mechanical component checks are crucial for diagnosing the issue. Start by inspecting the fan belts; look for signs of wear and ensure they are properly adjusted and lubricated. This simple step can greatly enhance performance. Don’t forget to check all moving parts for alignment, as misalignment can lead to unnecessary wear and loud noises during operation.
Next, examine the motor housing for any signs of overheating or damage. If you notice any issues, it may require replacement to avoid complete failure. The control panel is another key area to test; make sure all buttons and settings respond accurately. If you notice any inconsistent performance, document it, as recurring issues could indicate deeper mechanical problems that might need a professional’s expertise.
Also, ensure that all screws and fasteners are tightened. Loose components can vibrate and create noise, or worse, lead to mechanical failure. Consider the environment around the hood as well; high temperatures or humidity can affect component performance, so keep that in mind.
Next, inspect wiring connections for any signs of corrosion or wear. Damaged wiring is not just a performance issue, it can pose serious safety hazards. Also, check the condition of structural supports or brackets that hold the hood in place, ensuring stability during operation. Regular assessments of the entire exhaust system for signs of wear or damage will keep it functioning efficiently, allowing you to enjoy a smoke-free and odor-free kitchen.
9. Preventative Maintenance for Kitchen Exhaust Systems
To keep your kitchen exhaust system performing at its best, establishing a regular maintenance routine is essential. Start by creating a cleaning schedule for filters, ducts, and the entire exhaust system, ensuring both performance and hygiene are prioritized. Additionally, lubricate all moving parts annually to prevent wear and guarantee smooth operation over time. Regular inspections of electrical connections and wiring are crucial; look for signs of wear or corrosion and address any issues promptly to avoid a complete system failure. A checklist for routine maintenance tasks can be incredibly helpful, ensuring nothing is overlooked during inspections. Educating kitchen staff about the importance of reporting unusual sounds or performance issues can lead to early detection of potential problems. Keep a detailed log of all maintenance activities to track the history and condition of the system, which can help identify patterns over time. For even greater peace of mind, consider installing a monitoring system that alerts you to potential issues before they escalate. Always review manufacturer guidelines for maintenance to ensure compliance and optimal performance. Scheduling annual professional inspections can also catch problems that might not be visible during routine checks. Lastly, fostering a culture of maintenance among your kitchen staff promotes shared responsibility for the exhaust system’s upkeep, making sure everyone is invested in its functionality.
10. When to Seek Professional Help for Exhaust Issues?
If you’ve gone through the troubleshooting steps and your kitchen exhaust hood is still not performing, it’s time to consider calling in a professional. Safety and effectiveness are key, especially if you notice electrical issues like burning smells or smoke, which require immediate attention. Persistent mechanical problems that continue despite regular maintenance could signal deeper issues that only a technician can properly diagnose. Additionally, if you have a duct that needs cleaning and accessing it is a challenge, professionals can ensure a thorough cleaning without causing any damage.
Older exhaust systems may have outdated components that need replacing for better efficiency, so a professional evaluation can be invaluable. If your exhaust hood is frequently overheating or making strange noises, don’t hesitate to contact a technician who can safely identify and resolve these issues. When considering modifications or upgrades, experts can ensure that the work is done correctly and safely.
If your routine cleaning isn’t improving performance, professionals can dive deeper to diagnose any underlying issues that you might have missed. Documenting symptoms and any maintenance you’ve performed can also aid the technician in diagnosing the problem more effectively. Trust your instincts; if something feels off with your system, seeking professional help can provide you with peace of mind.